Showing posts with label Injury Prevention. Show all posts

Friday, March 30, 2012

Nutrition: A Missing Link to Treating an Injury


A sports-related injury is the last thing any athlete wants to experience. But, as stated in a recent article posted in Stack Media, “sometimes, injuries can’t be avoided.”

It takes countless amounts of time and dedication to carry out the specific rehab and treatment prescribed by the Athletic Trainer in order to heal properly and get back on the playing field.

The article mentions that the “Good Athlete” will rely soley on treatment and rehabilitation to get back on the field. However, the “Great Athlete” will also use sports nutrition in addition to his or her rehab and treatment regimen to heal his or her body quickly.

Katie Knappenberger, a Registered Dietitian and Certified Athletic Trainer, provides 6 great tips and information on how nutrition plays a major role in the healing process.

Read more by clicking: HERE


Source:
Stack Media: Stack Blog http://blog.stack.com/2012/03/27/use-sports-nutrition-to-heal-your-injury-fast/

Friday, March 2, 2012

Stay Thirsty My Friends


As athletes, we know that we need to drink water to stay hydrated while going through vigorous practices and games, but how much do we need and what are the consequences?  Many people have heard that 8 glasses of water per day is the correct amount of water to drink.  This is correct; however as athletes we are not the average bear when it comes to hydration.

Why is it important?
It is essential for us to maintain a balanced amount of fluids in our bodies each day.  Having adequate hydration improves your ability to train and your overall performance on the field or court.  Without adequate hydration, it is common to have cramps, heat stroke, sickness, lethargy, and an overall lack of performance.

Assessing Hydration
So how do you know if you are hydrated or not?  The best indicator to tell by is the color of your urine.  The lighter the color, the more hydrated you are. Darker colored urine, such as the color of apple juice is a sign of dehydration.  If you take a multivitamin soon after your urine will likely be darker due to the abundance of vitamins included which naturally turn your urine darker.

The amount you sweat has an effect on how much liquid you need to replace.  You should know how much water you need when you have your Bio-impedance test taken. You need to make the realization on how much you sweat and how much your body needs to consume during practice or games.  The sun in Baton Rouge can be very unforgiving so it is crucial to maintain proper hydration under harsh conditions. The biggest goal of staying hydrated is to drink as much as you need to prevent dehydration without drinking too much.

How much should I drink?
(Pre-workout) It is important to realize that preparing in advance can go a long way in preventing dehydration the next day or simply before practice/games.  Within a minimum of 2 hours before exercise try to drink roughly a 12-16oz of water (2 glasses).
(During) Sweat loss during exercise is different for everyone and typically the recommendation is 7-10 ounces of water for every 15-20 minutes. It is important to recognize how much you are sweating and to make sure you replenish what you lose.
(Post-Workout) If during your workout you notice that you have lost weight, it is recommended that you put back in what you had lost during activity. Drinking 16-24oz for every pound you lose can decrease the risk of dehydration.

Factors the manipulate fluid replacement
- Sweat rate
- Intensity of the workout
- Duration of the exercise
- Opportunities to drink
- Fluid availability

What should I be sippin' on?
- PowerAde is great during activities due to the added electrolytes-- but should not be consumed all the time due to its high sugar content. PowerAde ZERO is a good alternative for everyday use.
- Good ol' fashioned water
- Coconut water-- Low calorie, plenty of electrolytes and vitamins included
- Unsweetened tea with lemon

Stay away!

- Soda’s-  All sugar with added flavor and carbonations
- Lemonade, Snapple - Most are nearly as bad as soda’s
- Alcohol- dehydrates you by acting as a diuretic making you go to the bathroom more often
Juices- Are tricky, they are good in small amounts due to the vitamins included but contain loads of natural sugar made up of fructose.  Fructose can cause an upset stomach. Limit the usage of juice before large workouts (1 glass)
- Coffee/energy drinks- caffeine also acts as a diuretic, which makes you lose more water quicker

Contributed by Daniel Hunoway- Dietetic Intern at Tulane University 


Wednesday, February 1, 2012

Will Cholesterol Kill Baseball?


A recent article in the online Wall Street Journal reported that there have been several new contracts with rather large baseball players. Strength and power are the best words to describe some of the best MLB hitters. Therefore, it is necessary for these players to have a good bit of weight on them. However, too much weight and where that weight is coming from can be a problem...

According to the WSJ article, "Ron Noy, a New York-based sports orthopedist, said weight inevitably increases stress on lower extremity joints, such as hips, knees and ankles, as well as the lower spine. The force across these joints increases up to eight times their weight during competition, so more weight means a higher likelihood of meniscus tears, hip labral tears and impingements."

It is important for these players (and all athletes) to pay attention to the types of calories they are consuming. No matter what their calorie needs are, their diet should consist of a wide variety of lean and clean foods in order to enhance training, improve overall performance, and most importantly ensure optimal health.

Yankees pitcher, CC Sabathia "pledged to return to the Cap'n Crunch-free diet that allowed him to slim down before the 2011 season. 'I just need to go out and be healthy and try to do what I can to be up there for every start for this team,' he said. 'For me, that means losing weight, so that's what I'll do.'"

Read the full Wall Street Journal article here:

WSJ Baseball Article

Tuesday, December 27, 2011

ACL Post-Operative Rehabilitation

ACL Hamstring Tendon Graft Post-Operative Rehabilitation

Dr. Carey Winder
Baton Rouge Orthopaedic Clinic

ACL protocol is the same as bone patellar tendon bone except for the following:
1. When performing heel slides, make sure that a towel is used to avoid activating the hamstring muscles
2. Do not perform isolated hamstring exercises for 6 weeks
3. Partial weight bearing with crutches for 4 weeks

Week 1:
- Patient begins physical therapy 3-5 days post-op
- Initial therapy treatment consists of the following:
  • EMS/bio feedback to quads

  • Quad setting for 10 minutes

  • SLRs for 5 min

  • HSS sitting in chair (30 sec hold, 5 reps)

  • Calf stretching against wall (30 sec hold, 5 reps)

  • Patellar mobilization (emphasize superior glides)

  • 90-40 open chain manual resistance

  • ROM Passive: progress as tolerated (DO NOT MANUALLY FORCE ROM!)

To increase flexion:
May perform heel slides, wall slides, or chair flexions (wall slides preferred for hamstring grafted patients)

To increase extension:
May perform HSS, calf stretches, prone extensions (use biofeedback to relax the
hamstrings or manually teach relaxation of the hamstring during prone stretch)

Weight bearing:
  • Weight bearing as tolerated with crutches.

  • Continue use of crutches until gains quad control (3-6 weeks), then go to one
    crutch before FWB with no assistive devices

Cycling:

  • May begin stationary cycling when can flex to 110 degrees (DO NOT USE STATIONARY BIKE TO INCREASE FLEXION!)

Bracing:

  • Knee immobilizer when walking with crutches
Week 2 to 6:
- Will fit with a functional brace in the office. Wear the brace when ambulating to help protect from hyperextension injuries
  • Continue above exercises

  • Begin leg press from 90 to 20 degrees both legs.

  • Progress to single leg press, stopping at 40, 60, and 90 degrees. When
    stopping hold position for 5 seconds.

Bracing:

  • We measure for a functional brace such as the DonJoy Defiance at 3-6 weeks post-op:

  • We use the brace to protect the patient from possible hyperextension injuries.
Begin proprioceptive training:
  • Utilize the K.A.T. for balance, “stork” single leg balance with knee flexed to 20-30 degrees. Addition of biofeedback to enhance the VMO contraction is helpful. Use of sports cord may be instituted as long as patient has good quad control.

  • Pool Walking Okay – make sure patient realizes to walk only and not to perform whip kick
Weeks 6-12:
  • Lateral step ups

  • Progress with proprioceptive training

  • May begin running at 8-12 weeks when ROM normalizes and pain and swelling allow.

  • Start on trampoline, progress as tolerated to cushioned surface, then hard surface.
Isokinetic test:
  • At 180 and 300 degrees per second at 12 weeks.

  • Include results in report to M.D.
3 to 6 months:
  • Continue with above and may add partial squats, forward lunges with straight bar.

  • Progress as tolerated.

  • Do not perform if patient has patellar femoral symptoms!
6 to 12 months:
  • Begin sport specific drills

  • Return to activity based on KT-1000 scores and full ROM, Biodex test, and functional tests.

Thursday, February 17, 2011

LSU Baseball Return to Play Throwing Progression

This throwing program is designed to gradually increase stress on your reconstructed elbow after surgery. The program will begin approximately 4 months after surgery, after your Team Physician has released you to begin throwing. For some, you may begin later and that is the Team Physician's decision. This program is only a guideline and should be modified if soreness increases or pain begins. This program is set-up to increase throwing volume in a structured way. As you increase distance, you will be increasing intensity. Do not try to throw as hard as you can. The goal is to throw the ball on a line. Continuing your arm care program of shoulder and elbow strengthening is vital to the success of your throwing program. It is important not to get ahead of schedule, and it is not uncommon to shut down from throwing at certain points in the throwing program. Your new ligament is getting used to the stress of throwing and you must be patient and disciplined to be successful. Remember, this is a process to get you back where you want to be.

Click these links for Theraband and Table Top Weights exercises.

Week 1
Day 1: Light toss at 30 feet for 5 minutes. Maintain an arc on each throw. Theraband exercises.
Day 2: OFF
Day 3: Light toss at 30 feet for 5 minutes. Maintain an arc on each throw. Weights exercises.
Day 4: OFF
Day 5: Light toss at 30 feet for 5 minutes. Maintain an arc on each throw. Theraband exercises.
Day 6: OFF
Day 7: OFF

Week 2
Day 1: Light toss at 40 feet for 7 minutes. Maintain an arc on each throw. Theraband exercises.
Day 2: OFF
Day 3: Light toss at 40 feet for 7 minutes. Maintain an arc on each throw. Weights exercises.
Day 4: OFF
Day 5: Light toss at 40 feet for 7 minutes. Maintain an arc on each throw. Theraband exercises.
Day 6: OFF
Day 7: OFF

Week 3
Day 1: Light toss at 45 feet for 7 minutes. Maintain an arc on each throw. Theraband exercises.
Day 2: OFF
Day 3: Light toss at 45 feet for 7 minutes. Maintain an arc on each throw. Weights exercises.
Day 4: OFF
Day 5: Light toss at 45 feet for 7 minutes. Maintain an arc on each throw. Theraband exercises.
Day 6: OFF
Day 7: OFF

Week 4
Day 1: Throw on a line at 45 feet for 2 sets of 25 throws. Theraband exercises.
Day 2: OFF
Day 3: Throw on a line at 45 feet for 2 sets of 25 throws. Weights exercises.
Day 4: OFF
Day 5: Throw on a line at 45 feet for 2 sets of 25 throws. Theraband exercises.
Day 6: OFF
Day 7: OFF

Week 5
Day 1: Throw on a line at 45 feet for 3 sets of 25 throws. Theraband exercises.
Day 2: OFF
Day 3: Throw on a line at 45 feet for 3 sets of 25 throws. Weights exercises.
Day 4: OFF
Day 5: Throw on a line at 45 feet for 3 sets of 25 throws. Theraband exercises.
Day 6: OFF
Day 7: OFF

Week 6
Day 1: Throw on a line at 60 feet for 2 sets of 25 throws. Theraband exercises.
Day 2: OFF
Day 3: Throw on a line at 60 feet for 2 sets of 25 throws. Weights exercises.
Day 4: OFF
Day 5: Throw on a line at 60 feet for 2 sets of 25 throws. Theraband exercises.
Day 6: OFF
Day 7: OFF

Week 7
Day 1: Throw on a line at 60 feet for 3 sets of 25 throws. Theraband exercises.
Day 2: OFF
Day 3: Throw on a line at 60 feet for 3 sets of 25 throws. Weights exercises.
Day 4: OFF
Day 5: Throw on a line at 60 feet for 3 sets of 25 throws. Theraband exercises.
Day 6: OFF
Day 7: OFF

Week 8
Day 1: Throw on a line at 75 feet for 2 sets of 25 throws. Theraband exercises.
Day 2: OFF
Day 3: Throw on a line at 75 feet for 2 sets of 25 throws. Weights exercises.
Day 4: OFF
Day 5: Throw on a line at 75 feet for 2 sets of 25 throws. Theraband exercises.
Day 6: OFF
Day 7: OFF

Week 9
Day 1: Throw on a line at 75 feet for 3 sets of 25 throws. Theraband exercises.
Day 2: OFF
Day 3: Throw on a line at 75 feet for 3 sets of 25 throws. Weights exercises.
Day 4: OFF
Day 5: Throw on a line at 75 feet for 3 sets of 25 throws. Theraband exercises.
Day 6: OFF
Day 7: OFF

Week 10
Day 1: Throw on a line at 90 feet for 2 sets of 20 throws. Theraband exercises.
Day 2: OFF
Day 3: Throw on a line at 90 feet for 2 sets of 20 throws. Weights exercises.
Day 4: OFF
Day 5: Throw on a line at 90 feet for 2 sets of 20 throws. Theraband exercises.
Day 6: OFF
Day 7: OFF

Week 11
Day 1: Throw on a line at 90 feet for 3 sets of 15 throws. Theraband exercises.
Day 2: OFF
Day 3: Throw on a line at 90 feet for 3 sets of 15 throws. Weights exercises.
Day 4: OFF
Day 5: Throw on a line at 90 feet for 3 sets of 15 throws. Theraband exercises.
Day 6: OFF
Day 7: OFF

Week 12
Day 1: Throw on a line at 105 feet for 2 sets of 15 throws. Theraband exercises.
Day 2: OFF
Day 3: Throw on a line at 105 feet for 2 sets of 15 throws. Weights exercises.
Day 4: OFF
Day 5: Throw on a line at 105 feet for 2 sets of 15 throws. Theraband exercises.
Day 6: OFF
Day 7: OFF

Week 13
Day 1: Throw on a line at 105 feet for 3 sets of 15 throws. Theraband exercises.
Day 2: OFF
Day 3: Throw on a line at 105 feet for 3 sets of 15 throws. Weights exercises.
Day 4: OFF
Day 5: Throw on a line at 105 feet for 3 sets of 15 throws. Theraband exercises.
Day 6: OFF
Day 7: OFF

Week 14
Day 1: Throw on a line at 120 feet for 2 sets of 15 throws. Theraband exercises.
Day 2: OFF
Day 3: Throw on a line at 120 feet for 2 sets of 15 throws. Weights exercises.
Day 4: OFF
Day 5: Throw on a line at 120 feet for 2 sets of 15 throws. Theraband exercises.
Day 6: OFF
Day 7: OFF

Week 15
Day 1: Throw on a line at 120 feet for 3 sets of 12 throws. Theraband exercises.
Day 2: OFF
Day 3: Throw on a line at 120 feet for 3 sets of 12 throws. Weights exercises.
Day 4: OFF
Day 5: Throw on a line at 120 feet for 3 sets of 12 throws. Theraband exercises.
Day 6: OFF
Day 7: OFF

Pitching Progression
Week 16
Day 1: Warm-up getting to 120 feet for a few throws then work back in to 60 feet for your flatground and throw 20-30 pitches to a catcher throwing fastballs and change-ups only in your flatground. Do some form of conditioning, preferably running, for 20 minutes.
Day 2: Off of throwing. Weights and Theraband exercises.
Day 3: Light throwing up to 90 feet for 10-15 throws.
Day 4: Warm-up getting to 120 feet for a few throws then work back in to 60 feet for your flatground and throw 25-35 pitches to a catcher throwing fastballs and change-ups only in your flatground. Do some form of conditioning, preferably running, for 20 minutes.
Day 5: Light throwing up to 90 feet for 10-15 throws.
Day 6: OFF
Day 7: OFF

Week 17
Day 1: Warm-up to 120 feet for a few throws then work back in to 60 feet for your flatground and throw 20-30 pitches to a catcher throwing fastball, change-ups, and spin 3-5 in your flatground. Do some form of conditioning, preferably running, for 20 minutes.
Day 2: Off of throwing. Weights and Theraband exercises.
Day 3: Light throwing up to 90 feet for 10-15 throws.
Day 4: Warm-up getting to 120 feet for a few throws then work back in to 60 feet for your flatground and throw 25-35 pitches to a catcher throwing fastball, change-ups, and spin 5-7 in your flatground. Do some form of conditioning, preferably running, for at least 20 minutes.
Day 5: Light throwing up to 90 feet for 10-15 throws.
Day 6: OFF
Day 7: OFF

Week 18: Bullpen
Day 1: Warm-up getting to 75-90 feet for a few throws. Throw 1-12 flatground with all your pitches. Bullpen- throw 30 pitches all fastball with 60-70% effort. Do some form of conditioning, preferably running, for 20 minutes.
Day 2: Off of throwing. Weights and Theraband exercises.
Day 3: Light throwing up to 90 feet for 10-15 throws.
Day 4: Warm-up getting to 75-90 feet for a few throws. Throw 10-12 pitches flatground with all your pitches. Bullpen- throw 30 pitches all fastball with 65-75% effort. Do some form of conditioning, preferably running, for 20 minutes.
Day 5: Light throwing up to 90 feet for 10-15 throws.
Day 6: OFF
Day 7: OFF

Week 19: Bullpen
Day 1: Warm-up getting to 75-90 feet for a few throws. Throw 12-15 pitch flatground with all your pitches. Bullpen- throw 35 pitches, fastballs and change-ups, with 70-80% effort. Do some form of conditioning, preferably running, for 20 minutes.
Day 2: Off of throwing. Weights and Theraband exercises.
Day 3: Light throwing up to 90 feet for 10-15 throws.
Day 4: Warm-up getting to 75-90 feet for a few throws. Throw 12-15 pitches flatground with all your pitches. Bullpen- throw 35 pitches, fastballs and change-ups, with 70-80% effort. Do some form of conditioning, preferably running, for 20 minutes.
Day 5: Light throwing up to 90 feet for 10-15 throws.
Day 6: OFF
Day 7: OFF

Week 20: Bullpen
Day 1: Warm-up getting to 75-90 feet for a few throws. Throw 12-15 pitches flatground with all your pitches. Bullpen- throw 40 pitches, fastballs and change-ups, with 80-90% effort. Do some form of conditioning, preferably running, for 20 minutes.
Day 2: Off of throwing. Weights and Theraband exercises.
Day 3: Light throwing up to 90 feet for 10-15 throws. Throw all of your pitches when working back to 60 feet for 20-25 throws. Do some form of conditioning, preferably running, for 20 minutes.
Day 4: Warm-up getting to 75-90 feet for a few throws. Throw 12-15 pitches flatground with all your pitches. Bullpen- throw 40 pitches, fastballs and change-ups, with 70-80% effort. Do some form of conditioning, preferably running, for 20 minutes.
Day 5: Light throwing up to 90 feet for 10-15 throws. Theraband exercises.
Day 6: Get to 120 feet for approximately 10-15 throws depending on how your arm feels.
Day 7: OFF

Weel 21: Bullpen/Batters
Day 1: Warm-up for bullpen. Throw 8 pitches off mound with all your pitches (pregame warm-up). Bullpen- throw 25 pitches using all pitches and 90-100% effort. Throw 15 pitches to a batter (someone standing in, not actually hitting). Throw fastball and change-up only. Do some form of conditioning, preferably running, for 20 minutes.
Day 2: Off of throwing. Weights and Theraband exercises.
Day 3: Light throwing up to 90 feet for 10-15 throws. Throw all your pithces when working back in to 60 feet for 20-25 throws. Do some form of conditioning, preferably running, for 20 minutes.
Day 4: Get to 120 feet for approximately 10-15 throws depending on how your arm feels.
Day 5: Warm-up for bullpen. Throw 8 pithces off the mound with all your pitches (pregame warm-up). Bullpen- throw 30 pitches using all pitches and 90-100% effort. Throw 20 pithces to a batter (someone stanfing in, not actually hitting). Throw fastballs and change-ups only. Do some form of conditioning, preferably running, for 20 minutes.
Day 6: OFF
Day 7: OFF

Week 22: Bullpen/Batters
Day 1: Warm-up for bullpen. Throw 8 pitches off mound with all your pitches (pregame warm-up). Bullpen- throw 25 pitches using all pitches and 90-100% effort. Throw 15 pitches to a batter (someone standing in, not actually hitting). Throw fastballs and change-ups only. Do some form of conditioning, preferably running, for 20 minutes.
Day 2: Off of throwing. Weights and Theraband exercises.
Day 3: Light throwing up to 90 feet for 10-15 throws. Throw all your pitches when working back in to 60 feet for 20-25 throws. Do some form of conditioning, preferably running, for 20 minutes.
Day 4: Get to 120 feet for approximately 10-15 throws depending on how your arm feels.
Day 5: Warm-up for bullpen. Throw 8 pithces off mound with all your pitches (pregame wamr-up). Bullpen- throw 30 pitches using all your pitches and 90-100% effort. Throw 20 pithces to a batter (someone standing in, not actually hitting). Throw fastballs and change-ups only. Do some form of conditioning, preferably running, for 20 minutes.
Day 6: OFF
Day 7: OFF

Week 23: Bullpen/Batters
Day 1: Warm-up for bullpen. Throw 8 pitches off mound with all your pitches (pregame warm-up). Bullpen- throw 35 pitches using all pitches and 90% effort. Throw 20 pitches to a batter (someone standing in, not actually hitting). Throw fastballs, change-ups, and 3 curveballs. Do some form of conditioning, preferably running, for 20 minutes.
Day 2: Off of throwing. Weights and Therabands exercises.
Day 3: Light throwing up to 90 feet for 10-15 throws. Throw all your pitches when working back in to 60 feet for 20-25 throws. Do some form of conditioning, preferably running, for 20 minutes.
Day 4: Get to 120 feet for approximately 10-15 throws depending on how your arm feels.
Day 5: Warm-up for bullpen. Throw 8 pitches with all your pitches (pregame warm-up). Bullpen- throw 40 pitches using all your pitches and 90% effort. Throw 20 pitches to a batter (someone standing in, not actually hitting). Throw all pitches. Do some form of conditioning, preferably running, for 20 minutes.
Day 6: OFF
Day 7: OFF

Week 24: Bullpen/Batters
Day 1: Warm-up for bullpen. Throw 8 pitches off mound with all your pitches (pregame warm-up). Bullpen- throw 25 pitches using all pitches and 90% effort. Throw 15 pitches to a batter (someone standing in, not actually hitting). Throw fastballs and change-ups only. Do some form of conditioning, preferably running, for 20 minutes.
Day 2: Off of throwing. Weights and Theraband exercises.
Day 3: Light throwing up to 90 feet for 10-15 throws. Throw all your pitches when working back in to 60 feet for 20-25 throws. Do some form of conditioning, preferably running, for 20 minutes.
Day 4: Get to 120 feet for approximately 10-15 throws depending on how your arm feels. Theraband exercises.
Day 5: Warm-up for bullpen. Throw 8 pitches off mound with all your pitches (pregame warm-up). Bullpen- throw 30 pitches using all your pitches and 90% effort. Throw 20 pitches to a batter (someone standing in, not actually hitting). Throw fastballs and change-ups only. Do some form of conditioning, preferably running, for 20 minutes.
Day 6: OFF
Day 7: OFF

Week 25: Simulated Game
Day 1: Warm-up for simulated game. Throw 8 pitches off mound with all your pitches then rest for 2-3 minnutes (pregame warm-up). Throw maximum of 40 pitches to batters who are hitting, Throw all your pitches. Do some form of conditioning, preferably running, for 20 minutes.
Day 2: Off of throwing. Weights and Theraband exercises.
Day 3: Light throwing up to 90 feet for 10-15 throws. Throw all your pitches when working back in to 60 feet for 20-25 throws. Do some form of conditioning, preferably running, for 20 minutes.
Day 4: Get to 120 feet for approximately 10-15 throws depending on how your arm feels.
Day 5: Warm-up for simluated game. Throw 8 pitches off mound with all your pitches then rest for 2-3 minutes (pregame warm-up). Throw maximum of 40 pitches to batters who are hitting. Throw all your pitches. Do some form of conditioning, preferably running, for 20 minutes.
Day 6: OFF
Day 7: OFF

**When you finish this stage you are ready to begin pitching in games with a pitch count of 40 throws. That number will increase 5-10 pitches per week pending the approval of your Team Physician and your Athletic Trainer or Physical Therapist.

Created by Beau Lowery, PT, ATC

Shoulder Theraband Strengthening

Shoulder Tubing Program
Created by Beau Lowery, PT, ATC

In doing all of your tubing work, stagger your feet with your dominant foot back and your throwing shoulder blade retracted (as seen below). Go through a full range of motion and understand this is a strengthening program, not stretching. You should do 3-4 sets of each exercise and feel a good burn for the last 3-5 reps. Repetitions should be around 15-20. When you can do more than 20 reps, get a stronger band/tube.

1. Shoulder External Rotation with elbow by side. Be sure to keep your elbow by your side with the towel between your arm and chest. Maintain a 90 degree angle at your elbow and rotate externally as far as comfortable, then slowly return to full internal rotation. Keep your wrist in a neutral position, and concentrate on good posture with your ear directly over your shoulder. Do 3 sets to fatigue (around 15-20 reps).

Start position:

End position:
2. Shoulder Internal Rotation with elbow by side. Be sure to keep your elbow by your side with the towel between your arm and chest. Maintain a 90 degree angle at your elbow and rotate internally until you touch your stomach, then slowly return to a comfortable external rotation position. Keep your wrist in a neutral position, and concentrate on good posture with your ear directly over your shoulder. Do 3 sets to fatigue (around 15-20 reps.) Get a stronger band if your reps exceed 20 each set.

Start position:
End position:
3. Shoulder extension. Concentrating on good posture, retract your shoulder blade and pull backwards, while keeping your elbow straight, until your arm is even with your body. Be slow and controlled getting a good concentric, isometric, and eccentric contraction. Do 3 sets to fatigue.

Start position:
End position:
4. Shoulder External Rotation @ 90 degrees of abduction. Keep your elbow in the same plane of your shoulder. Keep your wrist locked and externally rotate your shoulder until your forearm is even with or just past your ear. Do 3 sets to fatigue (around 15-20 reps.) Get a stronger band if your reps exceed 20 repetitions each set.

Start position:
End position:
5. Scapular Retraction. Concentrating on good posture, stagger your feet, retract your shoulder blade, and pull your arm backward but concentrate on pulling your shoulder blade into a retracted position.

Start position:
End position:
End position (posterior view):
6. PNF - D2 Diagonal Pattern. Begin in an athletic position with your thumb down and only a slight bend in your elbow. Keep your elbow relatively straight while moving your arm into flexion. Also, rotate your thumb into the up position and retract your shoulder blade at the top of the movement. Then slowly return to the starting position.

Start position:
Mid position:
End position:

Table Top Weights Shoulder and Elbow Exercises

Scapula Stabilization/Rotator Cuff Program
Created by Beau Lowery, PT, ATC

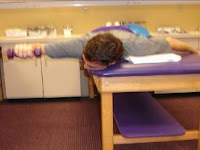
1. Y's. Hold weights in a neutral wrist position with your thumbs toward the ceiling. Set your shoulder blades and raise your arms to full flexion. Keep your elbows straight and concentrate on squeezing you shoulder blades together. You can also use just your throwing arm and have your head supported if this positioning causes any neck pain. Do 3 sets to fatigue (approx. 15-20) using between 2-5 lbs. Do not go over 5 lbs.

Start position:

End position:

2. T's. Hold weights in a neutral wrist position. Set your shoulder blades and raise your arms to the side. Keep your elbows straight and concentrate on squeezing you shoulder blades together. You can also use just your throwing arm and have your head supported if this positioning causes any neck pain. Do 3 sets to fatigue (approx. 15-20) using between 2-5 lbs. Do not go over 5 lbs.

Start position:End position:
3. V's. Hold weights in a neutral wrist position. Set your shoulder blades and raise your arms to the side. Keep your elbows straight and concentrate on squeezing you shoulder blades together. You can also use just your throwing arm and have your head supported if this positioning causes any neck pain. Do 3 sets to fatigue (approx. 15-20) using between 2-5 lbs. Do not go over 5 lbs.

Start position: End position:
** Important to understand with the 3 previous exercises you are strengthening the muscles of your shoulder blades as well as your shoulder. If you have neck pain, you can do your throwing arm only by hanging your shoulder off the side of the table with your head supported on the table. Always retract your shoulder blade first, then lift you arm in a pain-free range. Do not try to push through any pain or abnormal sensations. You want to feel a good muscle burn, but no catching or pinching sensation. Also, the reps are very person specific. I want you to feel a good burn the last 3 reps; therefore, if you feel a good burn during reps 7, 8, and 9, stop at 9 instead of 15. I encourage you to start with 2 or 3 lbs and progress with weight when you are able to do 20 reps for 3 sets and do not get fatigued. At that point, increase the weight and adjust your reps. Five pounds is the limit you use from a weight standpoint.

4. Prone external rotation @ 90 degrees of shoulder abduction. Start by lying on your stomach with your shoulder hanging off the edge of the table. Squeeze your shoulder blade back while lifting your arm even with your body. Then externally rotate your shoulder until your forearm is parallel to the floor. Make sure your movements are slow and controlled going up and down through the motion. Do 3 sets to fatigue (approx. 15-20) using between 2-5 lbs. Do not go over 5 lbs.

Start position:Mid position:End position:

5. Side lying external rotation. While lying on your side with a towel under your arm, retract your shoulder blade and slowly lift your arm while maintaining a 90 degree angle @ your elbow. Lift your forearm as seen in the picture below. Do not push through any pinching or painful sensation.

Start position:Mid position:End position:

6. Side lying internal rotation. While lying on your dominant side, slowly lift your arm while maintaining a 90 degree angle @ your elbow. Lift your forearm as seen in the picture below. Do not push through any pinching or painful sensation. Do 3 sets, approx. 15-20 using between 3-7 lbs. Do not go over 7 lbs. Be sure your shoulder is in front and you have no discomfort when going through full internal shoulder rotation. You will probably not feel the same intensity of burn because your internal rotators should be stronger than your external rotators.

Start position:

Mid position:

End position:

7. Supine Shoulder Protraction. While lying on your back and weight in you’re your hand, push your hand toward the ceiling. Your shoulder will actually protract and your hand will move toward the ceiling. The movement comes from your shoulder only and there should be no movement from your elbow.

Start position:End position:

8. Table Top Push Ups. This is a modified way of doing push-up plus except with less stress on the shoulder. Use the same principle as push-up or bench press - never go all the way until your chest touches the table. When you extend your elbow, protract your shoulder blades until you feel the hump in your upper back. Do 2-3 sets of 20 reps.

Start position:

End position:

Friday, January 28, 2011

Patellar Tendonitis

LSU Volleyball Patellar Tendonitis Protocol

Treatment:

  1. WARM-UP: make sure you warm up before any activity. You may get on a bike, or use a heat pack or hot tub if available.

  2. ICE: Ice the knee after all activity. This will help alleviate pain and reduce inflammation. Do this immediately after activity and again at night before bed.

  3. MEDICATION: You may take over-the-counter anti-inflammatory medication, as directed, such as Advil, Aleve, or Ibuprofen.

  4. TAPING/BRACING: you may want to use a strap or tape job over the patellar tendon. The cheapest way is to take pre-wrap and wrap it around the leg and roll it up into a small tube and allow it to rest on the patellar tendon where the most pain is present. Do this under your kneepad and use the kneepad to keep it in place. You may also purchase a strap used for “jumper’s knees”, however, this may not be as comfortable under the kneepads.

  5. STRETCHING: you should be stretching the entire leg daily. Emphasis should be placed on the quadriceps muscles as the patella is connected to them. You may want to consider using a foam roller if available.
    REST: if you are currently in season or doing heavy lifting in a weight room, you should back off the squats or plyometric work (jumping).

Rehabilitation:
The main goal to strengthen and stretch the quadriceps muscles.
These exercises should be done 3-4 times a week. Proper technique is very important, or you could actually make your injury worse.

  1. Straight Leg Raise 4x25 reps. Lying on your back, raise your leg up with the knee straight. Variation: add a cuff weight to the ankle.

  2. Leg Extensions 4x15 reps. If you have access to a weight room, you may use the leg extension machine, use one leg at a time. If not, sit on a table with your legs hanging off and using one leg at a time straighten your leg at the knee joint. You can increase resistance by adding a cuff weight to your ankle or wrapping elastic bands around your ankle and the table leg.

  3. Wall Sits 3x1min. Variations: ball behind your back or ball between your legs, squeezing your legs together.

  4. Body Weight Minisquats 5x20 reps. Do not allow your kneecap to go in front of your toes. Variation: one leg at a time.

LSU Women’s Basketball Jump Training Program

Created by Micki Collins, ATC

The following exercises can be done 3x’s per week-but no more. Read the instructions to make sure you are landing properly!!

Picture references can be found below.

Phase I

Week 1:

  1. 180 Jumps: 2 foot jumps, rotate 180 degrees in midair, hold landing 2 seconds, then repeat in reverse direction. 1 x 6

  2. Bounding in place: jump from one leg to the other, straight up and down, progressively increasing rhythm and height. 2 x 15

  3. Jump, Jump, Jump, Vertical: three broad jumps with vertical jump immediately after landing the third broad jump. 1 x 5

  4. Broad Jumps: as far as possible, hold landing 5 seconds. 1 x 5

  5. Wall Jumps, Ankle Bounces: with knees slightly bent and arms raised overhead, bounce up and down off toes. 3 x 15 seconds

Week 2:


  1. 180 Jumps: 2 foot jumps, rotate 180 degrees in midair, hold landing 2 seconds, then repeat in reverse direction. 1 x 6

  2. Bounding in place: jump from one leg to the other, straight up and down, progressively increasing rhythm and height. 2 x 15

  3. Jump, Jump, Jump, Vertical: three broad jumps with vertical jump immediately after landing the third broad jump. 1 x 5

  4. Broad Jumps: as far as possible, hold landing 5 seconds. 1 x 5

  5. Wall Jumps, Ankle Bounces: with knees slightly bent and arms raised overhead, bounce up and down off toes, 3 x 20seconds

Week 3:


  1. 180 Jumps: 2 foot jumps, rotate 180 degrees in midair, hold landing 2 seconds, then repeat in reverse direction. 1 x 8

  2. Bounding in place: jump from one leg to the other, straight up and down, progressively increasing rhythm and height. 2 x 20

  3. Jump, Jump, Jump, Vertical: three broad jumps with vertical jump immediately after landing the third broad jump. 1 x 6

  4. Broad Jumps: as far as possible, hold landing 5 seconds. 1 x 6

  5. Wall Jumps, Ankle Bounces: with knees slightly bent and arms raised overhead, bounce up and down off toes, 3 x 30seconds.

Phase II

Week 4:


  1. Bounding for Distance: start bounding in place and slowly increase distance with each step, keeping knees high. 3 x 15

  2. 360 Jumps: 1 x 10

  3. Wall Jumps: 4 x 30 seconds

  4. Scissor Jumps: start in stride position with one foot well in front of the other, jump up, alternating foot positions in midair. 1 x 12

  5. Single Legged-Jumps Distance: one legged hops for distance, hold landing, knees bent for 5 seconds, 1 x 5

Phase III
Week 5:


  1. Bounding for Distance: start bounding in place and slowly increase distance with each step, keeping knees high. 3 x 15

  2. 360 Jumps: 1 x 10

  3. Wall Jumps: 4 x 30 seconds

  4. Scissor Jumps: start in stride position with one foot well in front of the other, jump up, alternating foot positions in midair. 1 x 15

  5. Single Legged-Jumps Distance: one legged hops for distance, hold landing, knees bent for 5 seconds. 1 x 6

Week 6:


  1. Bounding: 3x’s through

  2. Wall Jumps: 4 x 15 seconds

  3. Squat Jumps: standing jump raising both arms overhead, land in squatting position touching both hands to the floor. 1 x 6

  4. 360 Jumps: 1 x 10

  5. Scissors Jumps: start in stride position with one foot well in front of the other, jump up, alternating foot positions in midair. 1 x 12

  6. Hop, Hop, Stick: single-legged hop, stick second landing for 5 seconds, increase distance of hop as technique improves. 1 x 8

Week 7:


  1. Bounding: 3x’s through

  2. Wall Jumps: 4 x 15 seconds

  3. Squat Jumps: standing jump raising both arms overhead, land in squatting position touching both hands to the floor. 1 x 6

  4. 360 Jumps: 1 x 10

  5. Scissors Jumps: start in stride position with one foot well in front of the other, jump up, alternating foot positions in midair. 1 x 12

  6. Hop, Hop, Stick: single-legged hop, stick second landing for 5 seconds, increase distance of hop as technique improves. 1 x 8

Week 8:


  1. Bounding: 3x’s through

  2. Wall Jumps: 4 x 15 seconds

  3. Squat Jumps: standing jump raising both arms overhead, land in squatting position touching both hands to the floor. 1 x 6

  4. 360 Jumps: 1 x 10

  5. Scissors Jumps: start in stride position with one foot well in front of the other, jump up, alternating foot positions in midair. 1 x 12

  6. Hop, Hop, Stick: single-legged hop, stick second landing for 5 seconds, increase distance of hop as technique improves. 1 x 10

180 Jumps

Bounding in Place

Jump, Jump, Jump, Vertical


Broad Jumps


Wall Jumps, Ankle Bounces


Bounding for Distance


360 JumpsScissor JumpsSingle Leg Jumps for Distance


Squat Jumps


Hop, Hop, Stick